Blockbench Setup
Blockbench is the official tool for creating 3D models and animations for Hytale. This guide walks you through installing Blockbench and the Hytale plugin to start creating custom assets.
Prerequisites
Section titled “Prerequisites”- A computer running Windows, macOS, or Linux
- Internet connection for downloads
- Basic understanding of 3D modeling concepts
Installation
Section titled “Installation”1. Download Blockbench
Section titled “1. Download Blockbench”Visit the blockbench downloads page and download the installer
Download the .exe installer and run it. Follow the installation prompts.
Download the .dmg file. Open it and drag Blockbench to your Applications folder.
Download the .AppImage file. Make it executable with chmod +x and run it.
2. Install the Hytale Plugin
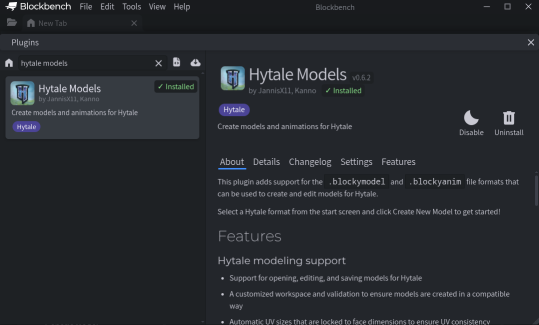
Section titled “2. Install the Hytale Plugin”The Hytale Blockbench plugin adds support for Hytale’s model format and constraints.
Option A: From Blockbench (Recommended)
- Open Blockbench
- Go to File > Plugins
- Search for “Hytale”
- Click Install on the Hytale Model plugin
Option B: Manual Installation
- Download from GitHub
- In Blockbench, go to File > Plugins > Load Plugin from File
- Select the downloaded
.jsfile
3. Verify Installation
Section titled “3. Verify Installation”After installing the plugin, verify it’s working:
- Go to File > New
- You should see Hytale Model as an option in the model type list
4. Configure Settings (Optional)
Section titled “4. Configure Settings (Optional)”For the best experience, configure these Blockbench settings:
- Settings > Grid > Set snap to
1for precise alignment - Settings > Preview > Enable “Show Axes” for orientation reference
- Consider setting up your preferred keybindings
Creating Your First Model
Section titled “Creating Your First Model”-
Create a New Hytale Model
- Go to File > New > Hytale Model
- Enter a model name (e.g.,
My_Custom_Sword) - Choose the appropriate scale:
- Props/Blocks: 32px = 1 block
- Characters/NPCs: 64px = 1 block
-
Add Geometry
- Use the Add Cube tool to create basic shapes
- Only cubes and flat quads are supported
- Maximum 255 nodes per model
-
Apply Textures
- Create or import a texture (must be multiples of 32px)
- Use the Paint tab to apply textures to faces
- UV map faces for precise texture alignment
-
Export Your Model
- Go to File > Export > Export Hytale Model
- Save as
.blockymodelfile - Export texture as
.pngseparately
Technical Requirements
Section titled “Technical Requirements”Hytale models have specific technical constraints:
| Constraint | Value | Notes |
|---|---|---|
| Max Nodes | 255 | Includes cubes, groups, and bones |
| Geometry Types | Cubes, Flat Quads | No triangles or complex meshes |
| Texture Sizes | Multiples of 32px | 32, 64, 96, 128, 256, etc. |
| Grid Scale (Props) | 32px = 1 block | Standard items and blocks |
| Grid Scale (Characters) | 64px = 1 block | Player models and NPCs |
| Geometry Stretching | 0.7x - 1.3x | Limited scaling per axis |
File Types
Section titled “File Types”Blockbench with the Hytale plugin exports these file types:
| Extension | Description | Usage |
|---|---|---|
.blockymodel | 3D model data | Model geometry and UV mapping |
.blockyanim | Animation data | Keyframe animations |
.png | Texture files | Model textures (32px multiples) |
Project Structure
Section titled “Project Structure”When creating assets for a plugin, organize files like this:
Directorymy-plugin/
Directoryassets/
Directoryitem/
- MyPlugin_Custom_Sword.json
Directorymodel/
DirectoryWeapons/
DirectorySword/
- …
- Custom.blockymodel
- Custom_Texture.png
- manifest.json
Common Issues
Section titled “Common Issues”Plugin Not Showing
Section titled “Plugin Not Showing”Export Fails
Section titled “Export Fails”Textures Look Wrong In-Game
Section titled “Textures Look Wrong In-Game”Best Practices
Section titled “Best Practices”- Plan your model before starting - sketch out the design
- Keep node count low - combine cubes where possible
- Use consistent scale - follow the 32px or 64px grid
- Name nodes clearly - helps with animation and debugging
- Test frequently - export and check in-game often
- Back up your work - save
.bbmodelfiles as backups - Match Hytale’s art style - study existing assets for reference
Animation Basics
Section titled “Animation Basics”To create animations:
-
Set up bones
- Create a bone hierarchy in the Outliner
- Name bones descriptively (e.g.,
Handle,Blade,Guard)
-
Open the Animation tab
- Click the Animate tab in Blockbench
- Create a new animation
-
Add keyframes
- Move the timeline to a position
- Transform bones (rotate, move, scale)
- Keyframes are created automatically
-
Export animation
- Go to File > Export > Export Hytale Animation
- Save as
.blockyanimfile
Animation Naming Conventions
Section titled “Animation Naming Conventions”For weapons, use these naming patterns:
| Animation | Purpose |
|---|---|
Idle | Default held position |
Swing_Left | Left swing attack |
Swing_Right | Right swing attack |
Swing_Down | Overhead attack |
Thrust | Stabbing motion |
Guard | Blocking stance |
Dropped | Dropped on ground |
Resources
Section titled “Resources”Official Resources
Section titled “Official Resources”- Blockbench Website - Download and documentation
- Hytale Model Guide - Official modeling guide
- Hytale Asset Guide - Asset creation overview
Community Resources
Section titled “Community Resources”- Hytale Blockbench Plugin (GitHub) - Plugin source code
- Blockbench Wiki - General Blockbench documentation
Next Steps
Section titled “Next Steps”Related
Section titled “Related”- Plugin Manifest - Including assets in plugins
- Item System Overview - Item JSON structure
- Weapons - Weapon documentation